WordPress is the most used open source platform for web development and can be used to create any type of websites. WordPress is written in PHP as scripting language. To install WordPress in Windows PC we need a web server with PHP 5.6 or greater and MySQL 5.6 or greater. Also for PHP and MySQL scripts, Apache or Nginx is needed. In this article Apache is used as our web server.
Apache HTTP Server or Apache is the world’s most used open source web server software. 60% of all the websites on the internet are using Apache as it supports variety of features.
Local web server can be created using an app called XAMPP which is an open source, cross platform web server solution for PCs. Web Server is computer program that responds to the request and delivers the content of the page back to the user. Request is sent to the web server when user enters web address in the browser. WAMP is also available only for windows. XAMPP is light weight web server for your PC and can be used for testing and deployment purpose. XAMPP can be used to install any web application like WordPress, Joomla, Ghost, Drupal in your local machine.
To install WordPress in your Windows PC these are required:
XAMPP
XAMPP is an application which installs Apache distribution containing MariaDB, PHP, and Perl in your PC, so that WordPress is able to run in Windows. We can also use WAMPP.
Microsoft Visual C++ Redistributable Package
There are different versions of PHP, hence different versions of Microsoft Visual C++ Redistributable Package are also available. Most Versions of PHP are built with VC9, VC11, VC14 or VC15 (Visual Studio 2008, 2012, 2015 or 2017 compiler respectively). So the conclusion is that the latest version of XAMPP, VC15 build requuires Visual C++ Redistributable for Visual Studio 2017 x86 or x64. Similarly VC11 builds require to have Visual C++ Redistributable for Visual Studio 2012 x86 or x64 installed and VC14 builds require to have Visual C++ Redistributable for Visual Studio 2015 x86 or x64 installed in your machine. This should be remembered while downloading the XAMPP.
For example, in this tutorial we use PHP 7.2.7 and we have to download XAMPP v7.2.7 for Windows. The downloaded file name is “xampp-win32-7.2.7-0-VC15-installer.exe”, hence we can conclude that we require Microsoft Visual C++ Redistributable Package 2017 x86 or x64 installed. For 32 bit Windows only install VC11 x86, for 64 bit Windows install both VC11 x86 and x64. In my case I have already installed these.
DOWNLOAD LINKS:
- XAMPP
- Microsoft Visual C++ Redistributable Package if not installed in your PC already.
Steps:
 Run ‘xampp-win32-5.6.24-1-VC11-installer’, then you will see the following warning message, saying don’t install XAMPP in regular installation folder (C:\Program Files (x86)). It is important because Windows don’t allow you to modify the files of C:\ drive. Hence if you install XAMPP in C:\ drive, you have to run XAMPP as Admin.
 Follow the installation process. Enter ‘Next’.
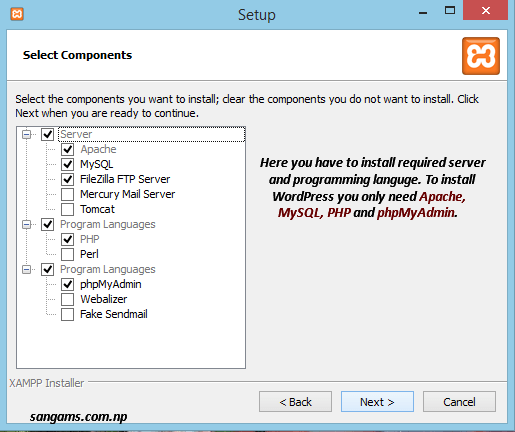 Select the required servers and programming language to install in your Windows PC. To install WordPress you only need Apache, MySQL, PHP, and phpMyAdmin, so only select them and enter Next. You can also install all the package, as your wish.
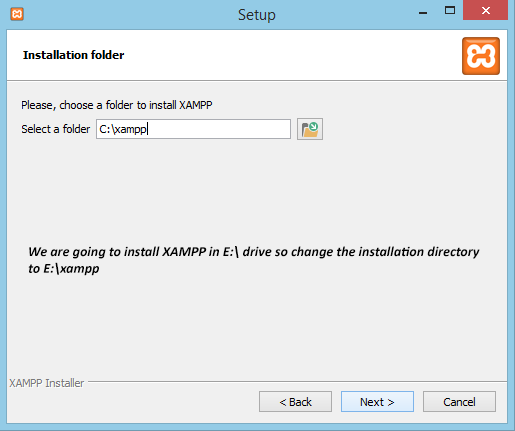 Here the default location is C:\. Since Windows does not allows to directly modify files of the C:\ drive, we have to run XAMPP as admin each time. I am going to install XAMPP in E:\ drive. You can choose any drive, whatever you want. Change the location from C:\xampp to E:\xampp and enter Next.
 Installation directory is changed from C:\ to E:\. You can also install XAMPP in C:\xampp, but you must run XAMPP with Administrator privileges/rights. It is recommended to run XAMPP with Administrator privileges even when installed in other directories than C:\.
 Continue your installation. Enter Next.
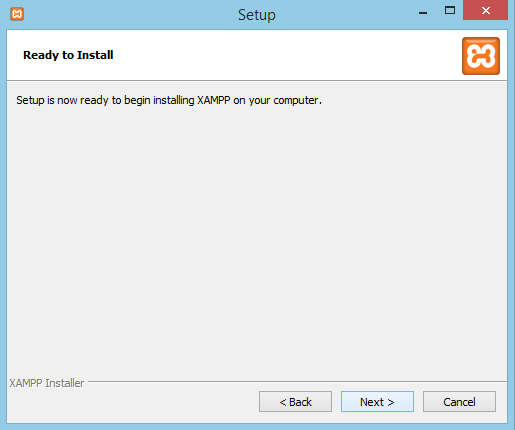 Continue your installation.
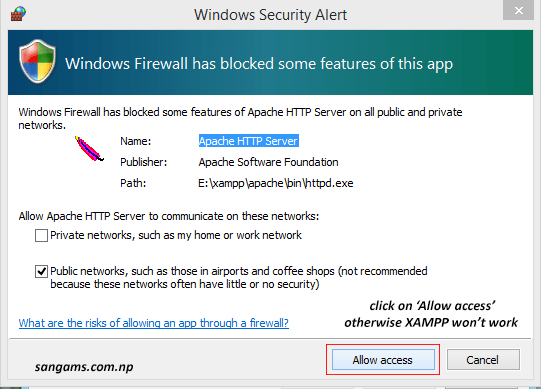 Windows Firewall blocks Apache Server if enabled so allow access to Apache HTTP Server otherwise XAMPP won’t work.
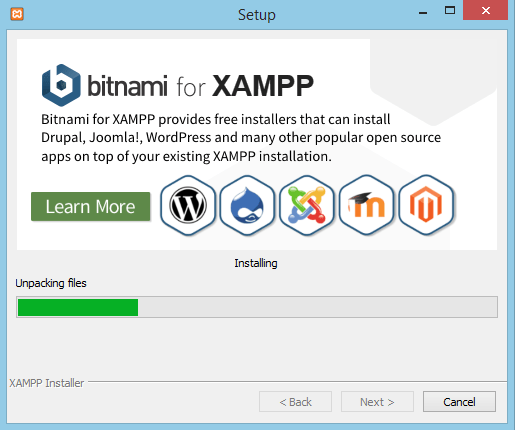 Now installation starts, wait until installation completes. It may take few minutes according to your PC’s performance.
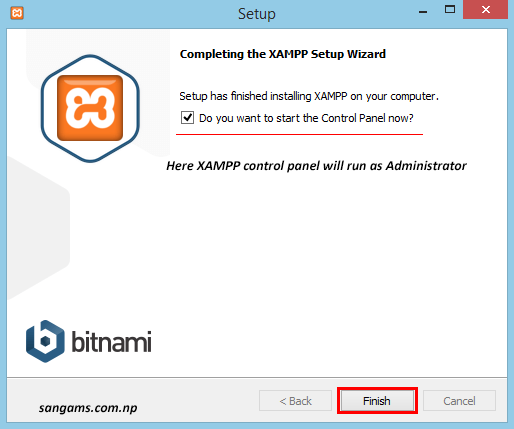 Now complete the installation process by pressing Finish. Here XAMPP will run with Administrator privileges for the first time because it had already asked about it when installing the app.
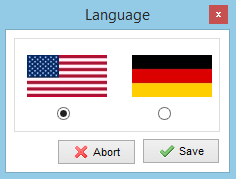 After that select language and press Save.
 When you start XAMPP you have to run XAMPP with Administrator rights as shown in figure.
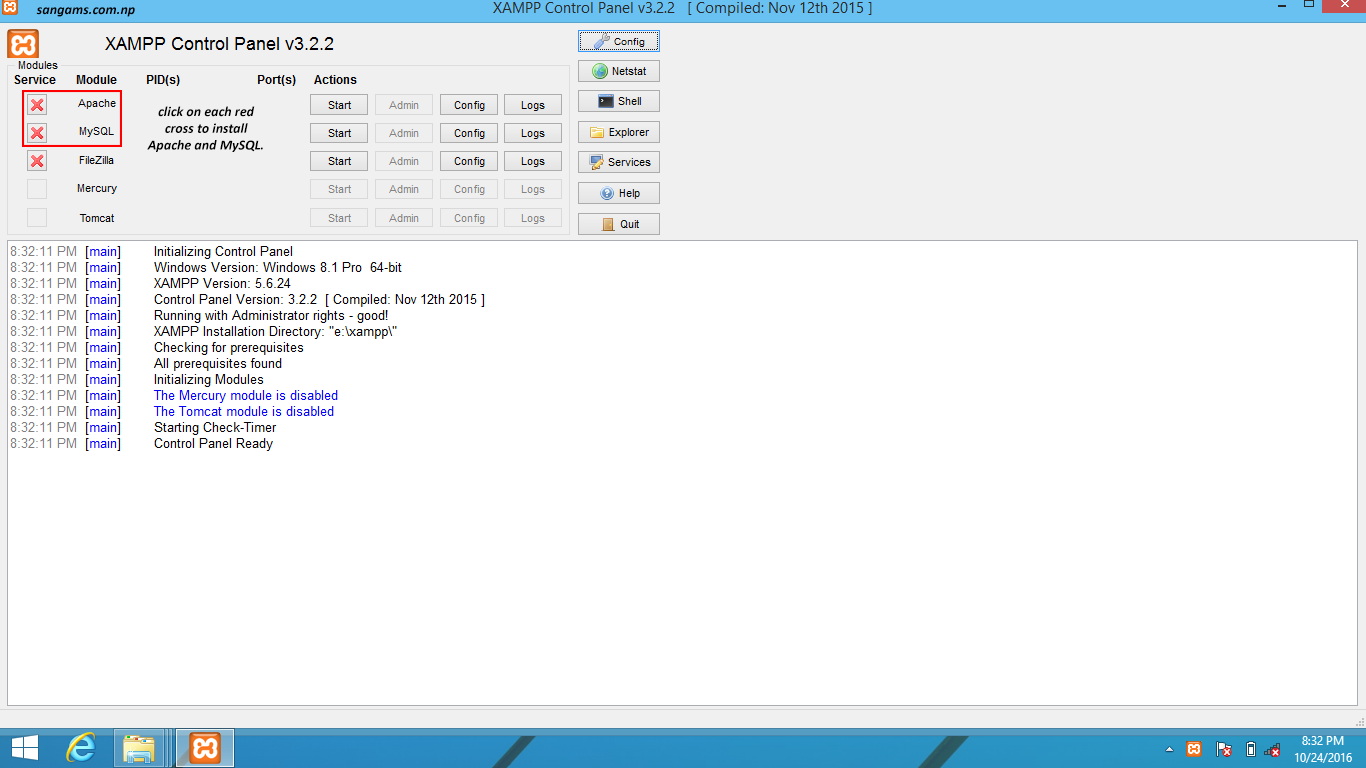 You can see in the image that Apache and MySQL are not installed in your PC, so click on red crossed sign to install them. After clicking them, they are installed now you need to start them.
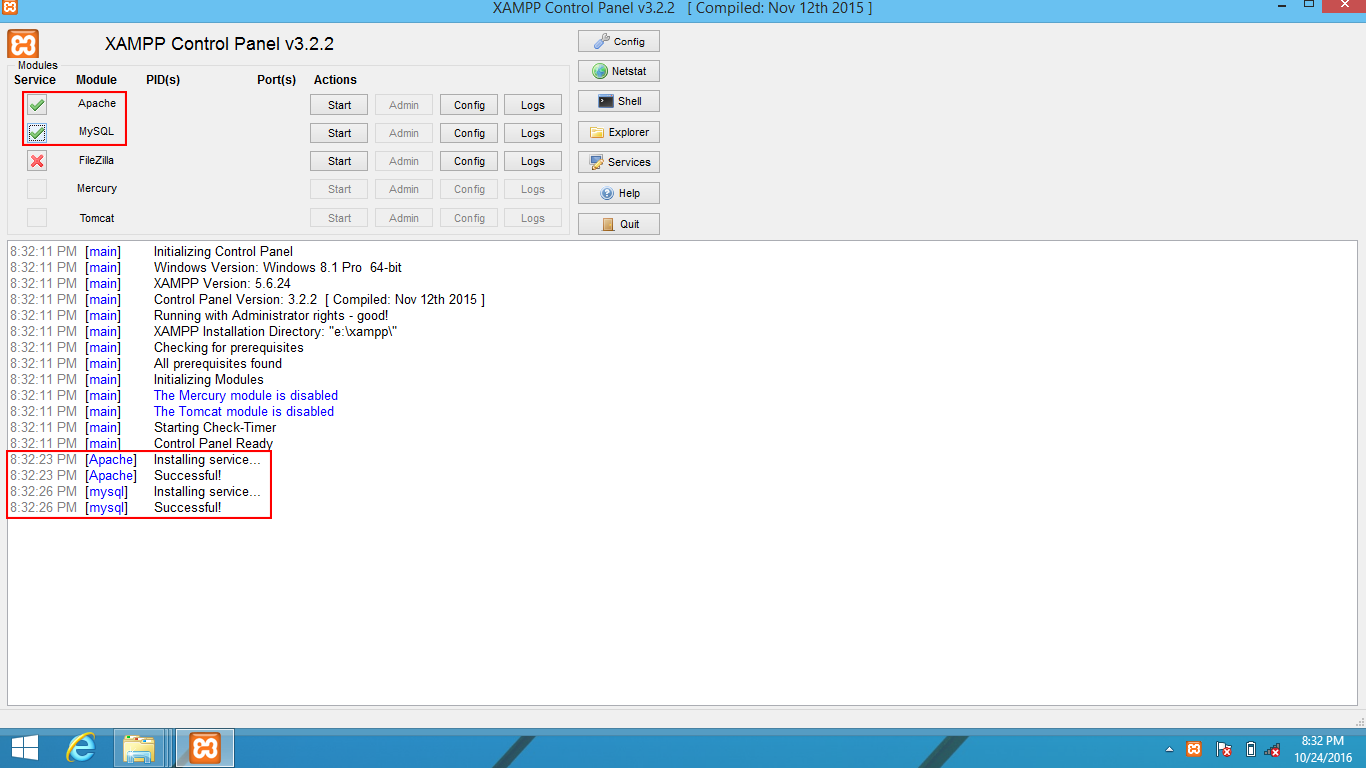 Now Apache and MySQL are installed, click on start to start them.
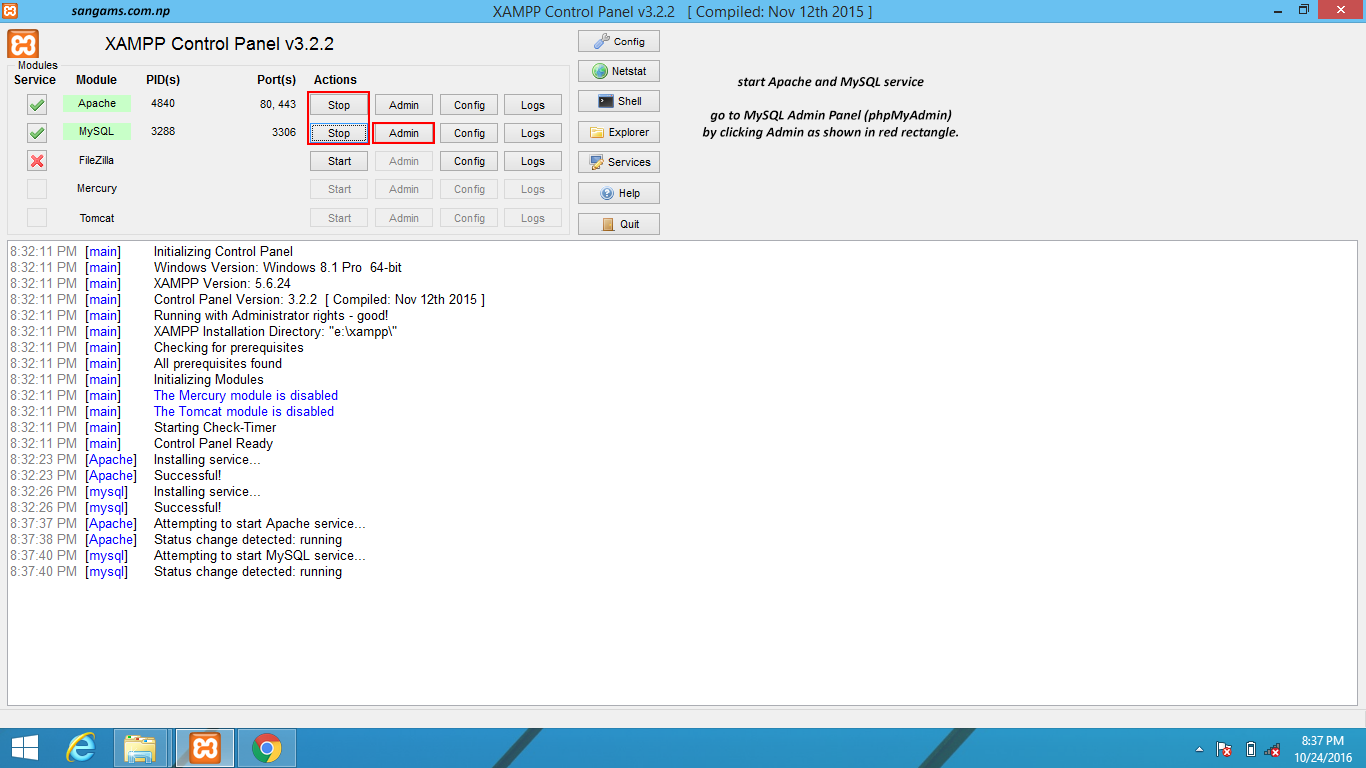 Go to MySQL admin panel (phpMyAdmin) by clicking on admin tab of MySQL.
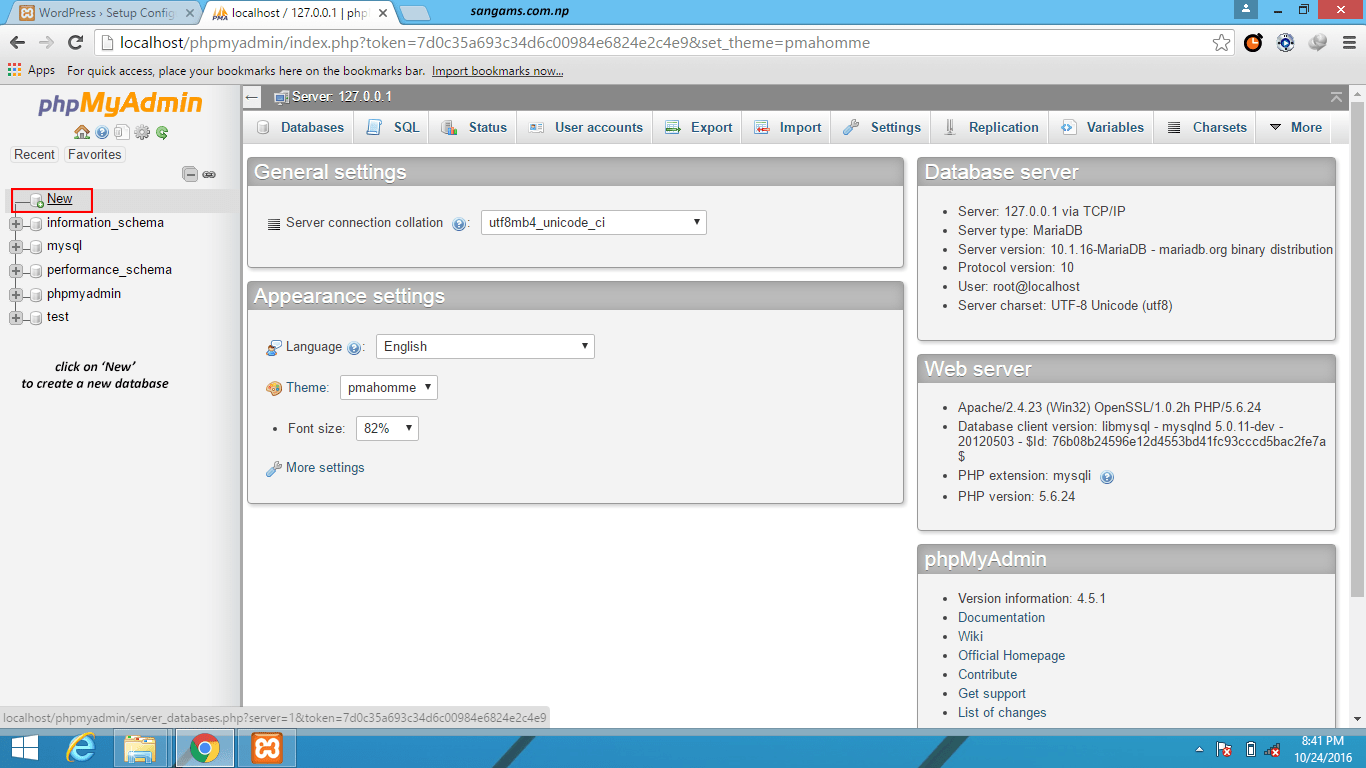 This is phpMyAdmin panel here you can create and modify your databases. All the required databases are for WordPress are stored here. A small mistake in the database would stop you WordPress from working. Click on new to create a new database as shown in fig.
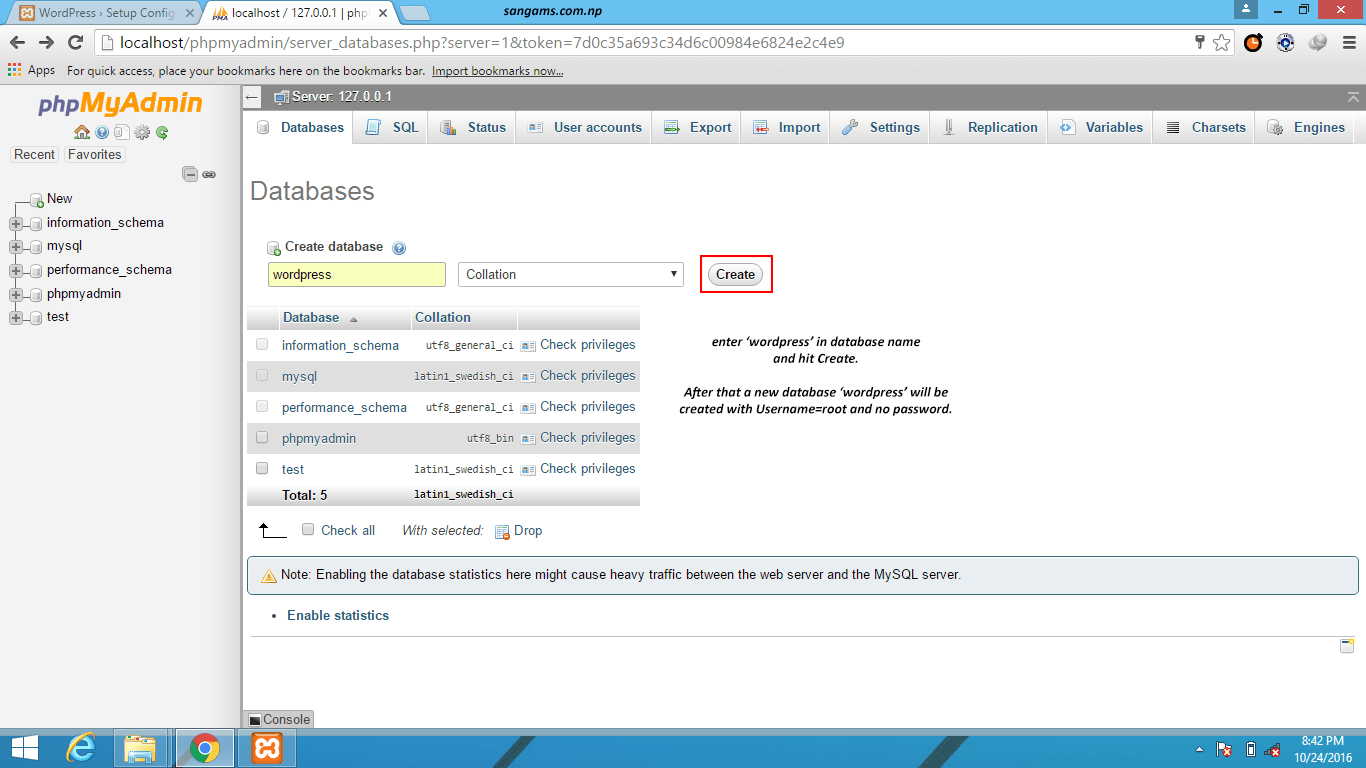 Enter ‘wordpress‘ in the database name and click on create. After that a new database will be created with name wordpress. You can can choose a different name also.
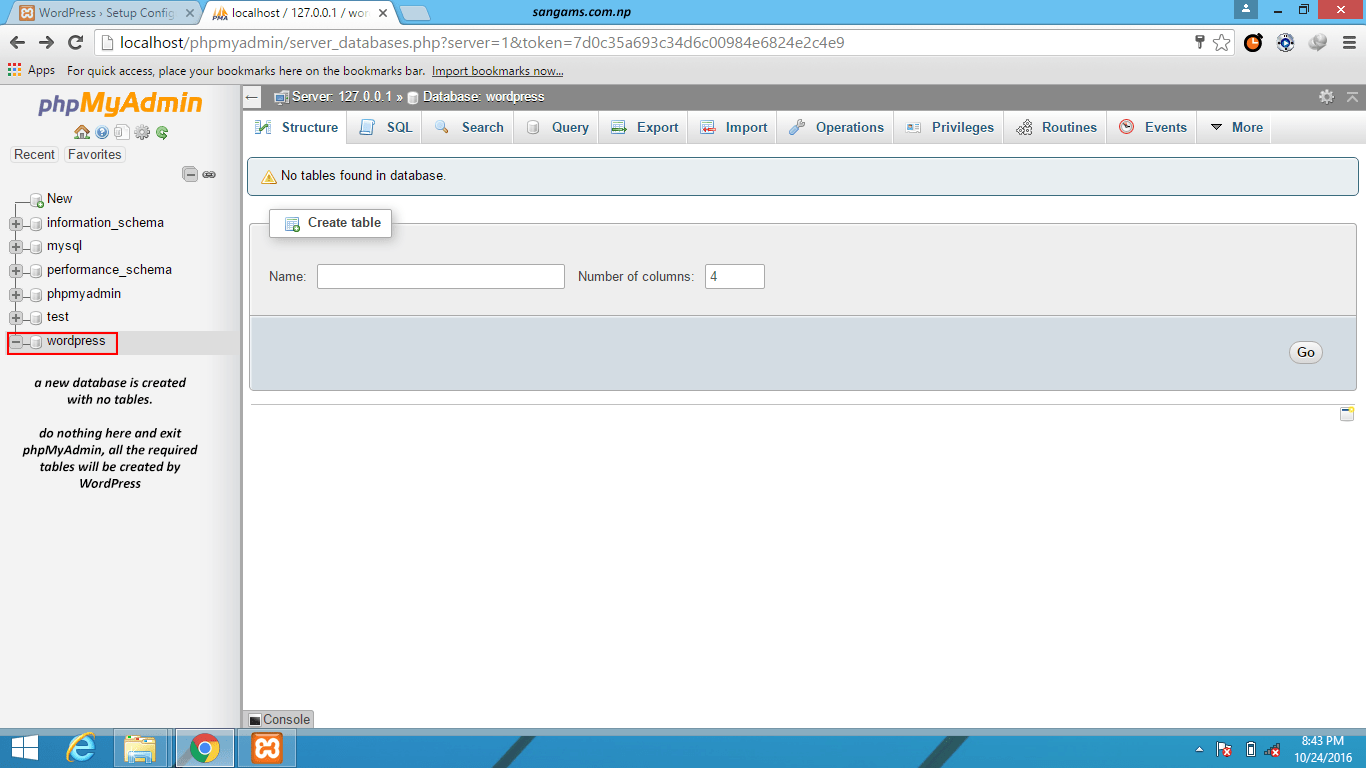 Now you can see a new database is created with name, wordpress. Do nothing after that and just exit, because all the required tables will be created by WordPress. Exit phpMyAdmin.
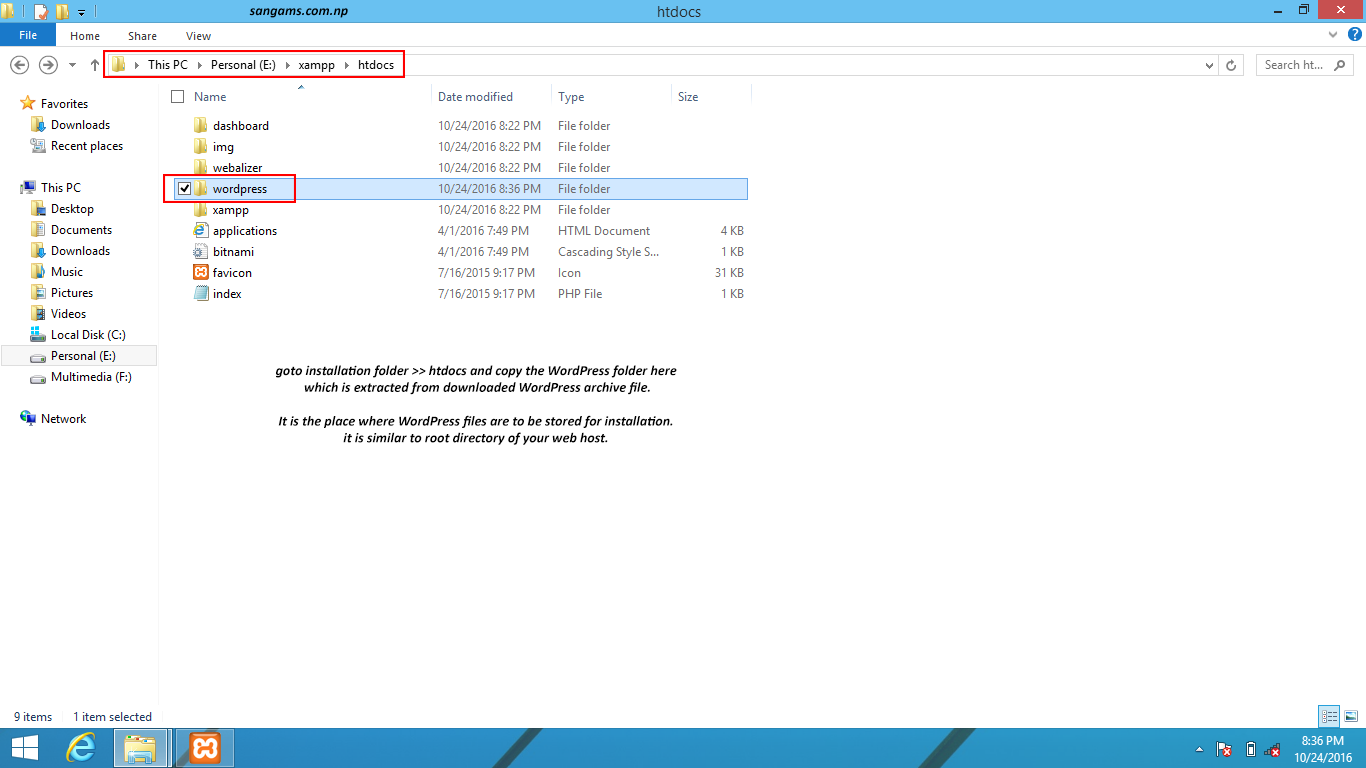 Now you have to copy your wordpress files to htdocs folder. For this extract your downloaded wordpress archive file in htdocs folder of installation directory. In this tutorial I have extracted in E:\xampp\htdocs.
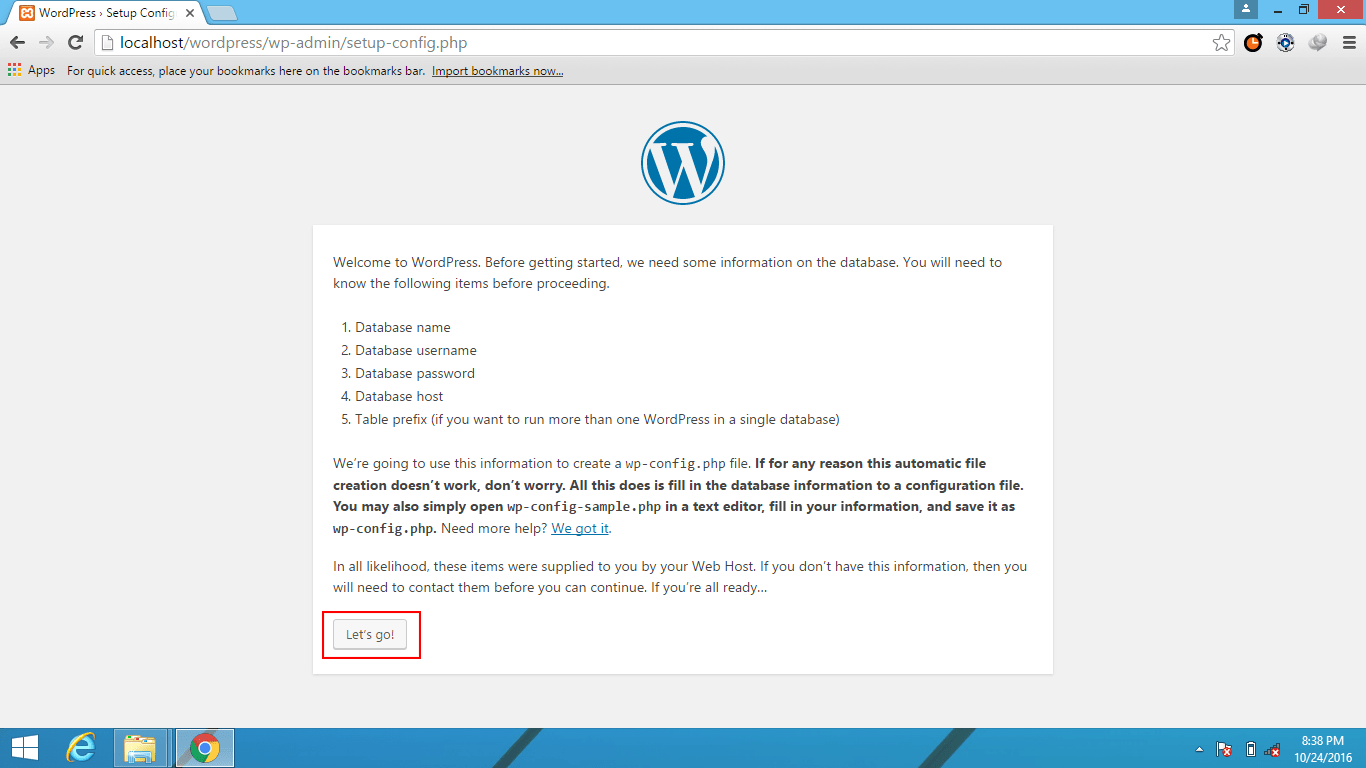 After that it is time to install WordPress, and allow WordPress to establish connection to database. For this open a browser and type http://localhost/wordpress in the URL (refer to image for ease). http://localhost/wordpress is same as web address. You can see a welcome page asking database name, database username, database password, database host and table prefix. We know the database name is wordpress which is just created from phpMyAdmin. Other details are given in passwords.txt file in installation folder.
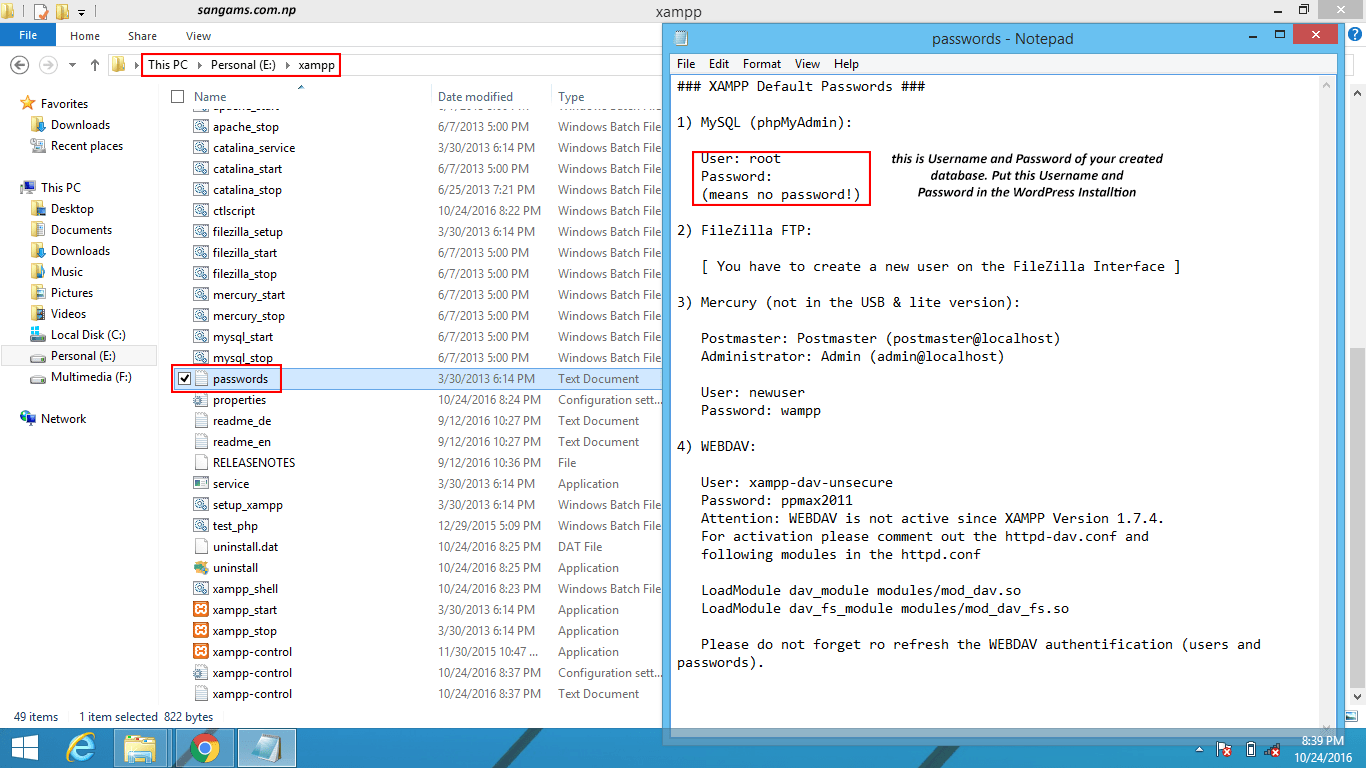 For database username and password go to E:\xampp and open passwords.txt file.
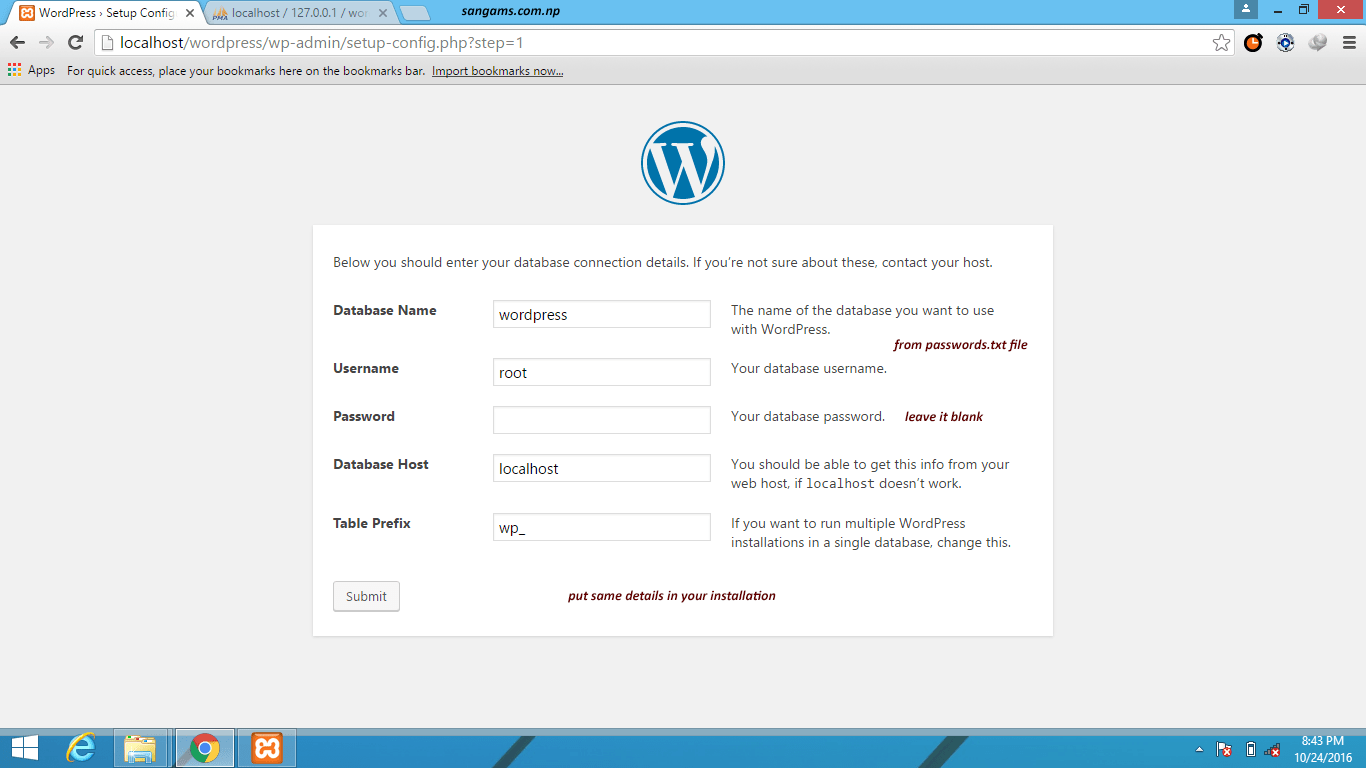 Fill database name with ‘wordpress‘ and username with ‘root‘, leave password empty. Database host is ‘localhost‘ and leave table prefix as is.
 Now the connection between WordPress and database is established. Click on ‘run and install button‘.
 Fill the information of your website and install.
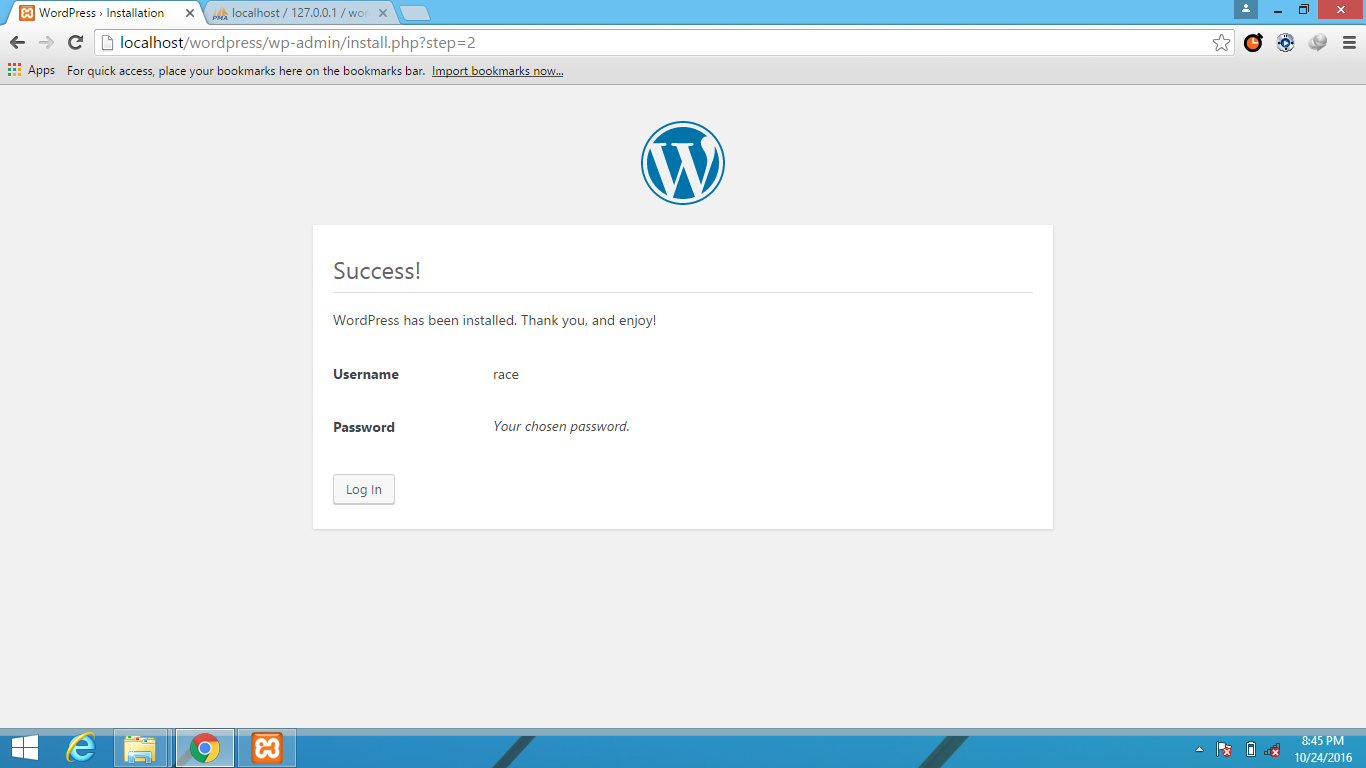 You can see a successful message of your WordPress installation. Click on ‘Log in‘ button. Login with your username and password which you have just entered in site information.
 This is your WordPress Dashboard from where you can customize your site, change themes, add plugins.
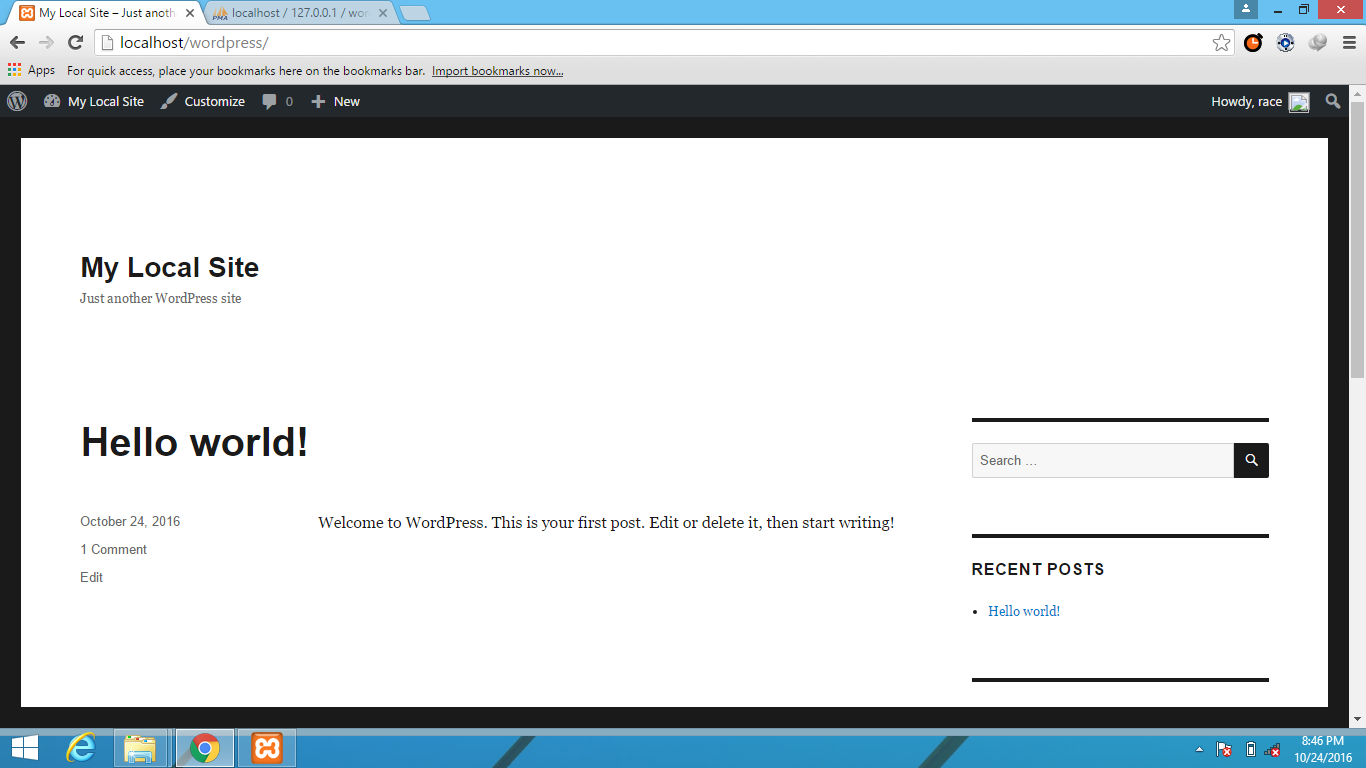 This is what your site looks like for the first time. You can change theme, write posts, edit posts and comments from your dashboard.
Now you have installed WordPress in you Windows PC i.e. locally. Installing WordPress in a PC is a good way to learn and manipulate WordPress. This site is not visible to public and visible only in your PC. To make a visible website/blog you have to buy a web host, a domain name and then after you have to install WordPress in your server.

Thanks !
Very Nice explanation